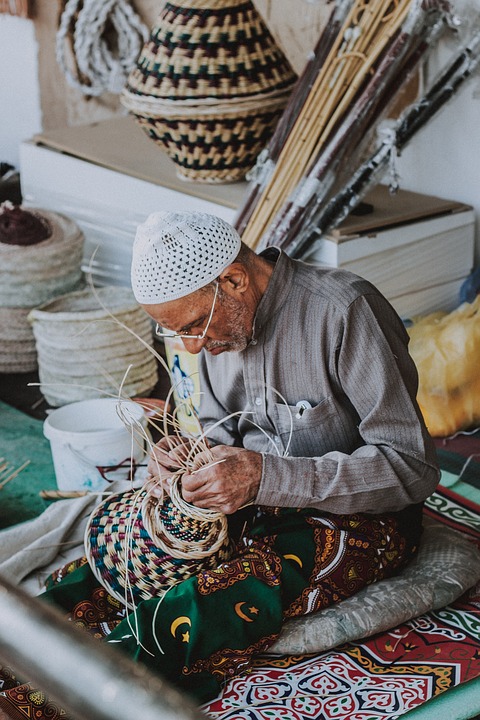
A man using traditional basket weaving technique to make beautiful baskets
Tool making is something humans have been practicing for over two million years! Tools have not only helped to make our lives easier, but have also helped to create culture. Learning how to make primitive tools can be a fun and useful outdoor skill, like the compass Brock showed us how to make on Wednesday.
Making tools for yourself wouldn’t be a top priority in a survival emergency. But if you had to live in the wild for a longer period of time, or just want to meet more of your needs with your own hands, it’s useful!
Basket weaving is found in most cultures around the world. Baskets are essential! You can use them for gathering food, as backpacks, as baby carriers, as cupboards, as plates and cups, as cradles, as birdcages, as measuring cups, and to catch fish (just to name a few!). Some baskets can even hold water!
Think about the things in your house. If you couldn’t buy anything at the store, how many of them could be replaced with a basket?
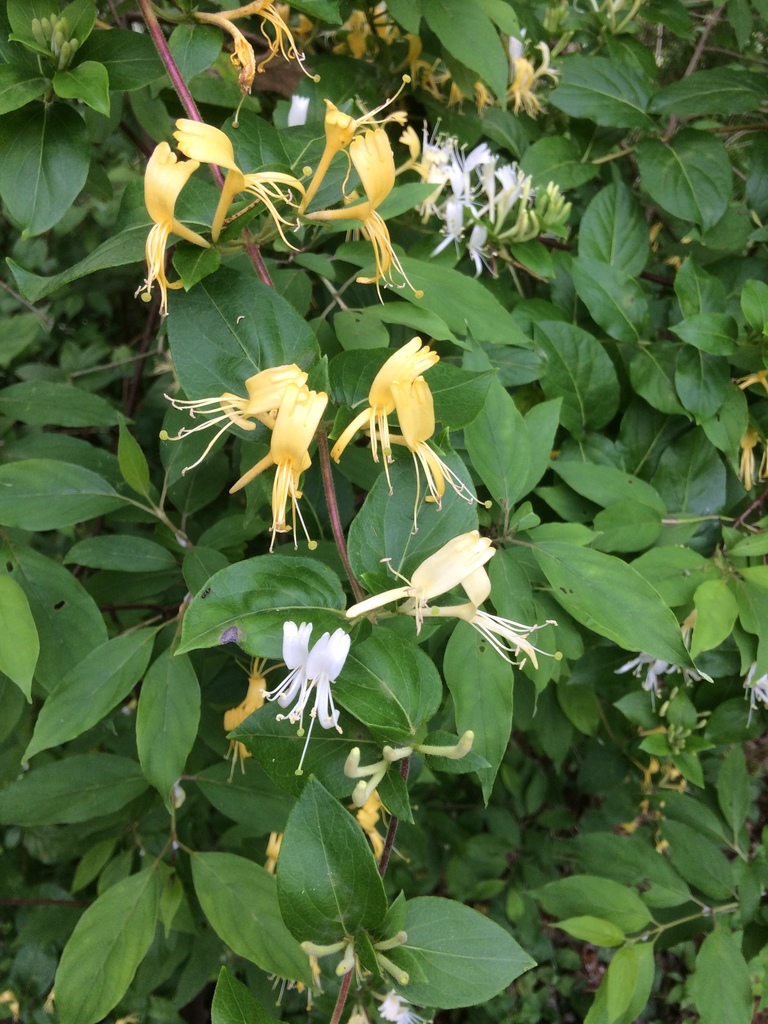
Japanese Honeysuckle. Photo: rockyrverbirder on iNaturalist
Today we will learn how to weave baskets out of Japanese honeysuckle vine. One reason we chose Japanese honeysuckle is that it’s an invasive plant (remember what an invasive is?). Just like garlic mustard, using this invasive plant is one way to get rid of it! It’s also easy to find, anywhere you live.
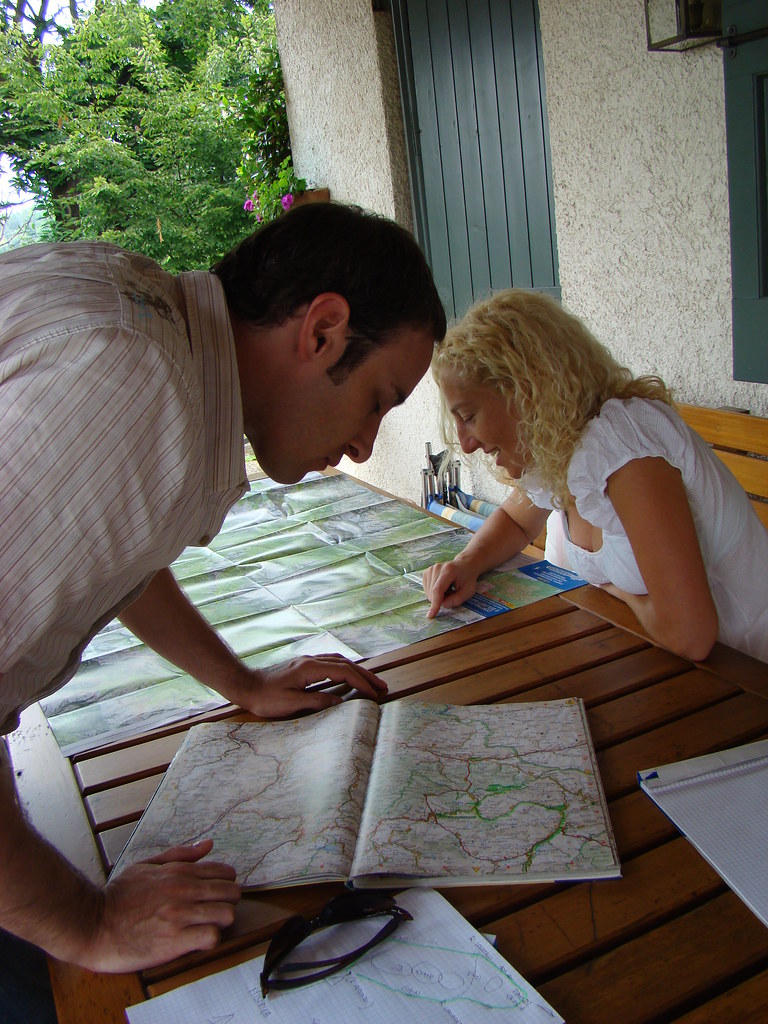
Everyone can benefit from learning to use a map and compass! Most people nowadays are used to using electronic devices to get from point A to point B. But what if they are not working, you are somewhere without any signal, or you do not have them? Can you make sense of even a GPS map of the forest, without any roads as clues? This is why experienced outdoor adventurers bring their maps and compasses.
Even experienced adventurers have found themselves lost in the wilderness, unsure of the way out. Our co-worker Darcy even got lost in the woods behind her house once. This can turn a simple hike into a dangerous situation. If you know how to use a map and compass, you can prevent this problem, and find the way out more easily.
Last week, we covered the first things you usually need to do survival situations: taking care of your brain, followed by makingshelter. But how will you get water? That’s the next priority.
When out in the wilderness, plan how you will get water before you go! Always pack plenty of water in your bag. The average adult should drink 3-4 liters of water a day, and children should drink anywhere from 1-3 liters per day depending on your age and size. So, if you don’t want to carry all of that water with you, you’re going to need a way to collect water when (or better yet, before) you run out.
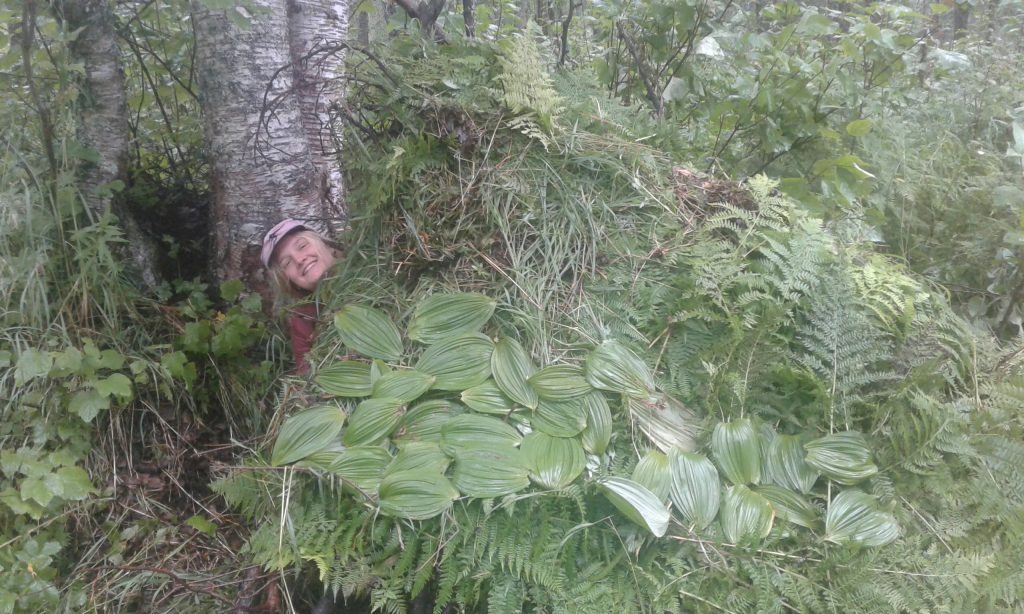
The first time I slept in a shelter I built myself, I was camping out with many other families. Everyone else had tents. But I was determined to try something new.
The shelter I slept in that night looked a lot like this.
I found a solid tree to support a stick frame. I covered the sticks with thick, thick layers of leaves. Luckily, the kids helped carry big armfuls of leaves for the roof and the ground. It went much faster with many hands! I only barely fit inside the small lean-to.
As evening fell, the sky grew dark. Gulp…it was going to rain.
On Monday, Nate talked about basic wilderness preparation and what to take care of first in a survival situation. After air, what’s the most urgent priority? Shelter!
Today, we’ll talk about the science of staying warm and dry, and learn from animals. Then, we have an experiment: can you build a shelter that stays warm?
What makes a good outdoor shelter?
Top of a basic wilderness shelter.
You might think about how comfortable the shelter is, or how protected it is. But one of the most important elements of a good shelter is how insulated it is.
Insulation is material that slows the loss of heat.
It is much harder to survive outdoors in the elements when your body is not at the ideal temperature.
Too much heat loss can even lead to hypothermia, a potentially deadly condition in which your body is way, way too cold.
The ideal body temperature for humans is between 97.7 and 99.8 degrees Fahrenheit. To stay at this temperature, our bodies constantly adjust themselves. We might sweat or shiver to cool off or warm up. Other warm-blooded animals, like deer or birds, do this too.
In contrast, cold-blooded animals like lizards and turtles can’t control their body temperatures internally themselves. They have to use the outside environment instead. If you see a turtle basking in the sun, it is using the sun to regulate its body temperature!
We want to keep as much heat as we can in our shelter! To do this, we have to slow down conduction.
Conduction happens when two objects of different temperatures touch each other. Heat moves from the warmer object to the colder one. In a shelter, this could be heat traveling from your warm body to the cold ground.
Insulation slows conduction. Fluffy materials that trap air inside are good insulators: think of piles of leaves, bubble wrap, down feathers inside a coat, or bubbly styrofoam. The trapped air is a barrier for heat transfer between two objects.
In winter, this is why we humans wear extra layers of clothing! Clothing itself does not provide heat. But air gets trapped in a few places: Air gets trapped in the fibers of your shirt, or the fluffy stuffing of your coat. And air also gets trapped in between your layers of clothing, such as between a coat and a long-sleeve shirt. These air pockets stop heat from leaving your body and escaping into the colder air.
If you get cold easily like me, I also like to wear a thick hat, scarf, gloves and multiple layers of shirts over my coat when I am outside in winter. The more layers I wear, the warmer I feel because all those layers add extra insulation – which means less heat escaping from my body into the colder winter air!
When you are building your shelter, keep conduction and insulation in mind. Where are warmer objects (like people) touching colder objects (like the ground or air)? Add insulation in those places to prevent heat loss!
Animals Build Insulating Shelters Too
Wild animals might not understand the exact science of heat loss like we do. But they do understand that heat loss is dangerous.
Just like humans, animals also insulate their shelters to prevent heat from escaping their warm, cozy homes!
What Do wild animals use to insulate their nests or shelters?
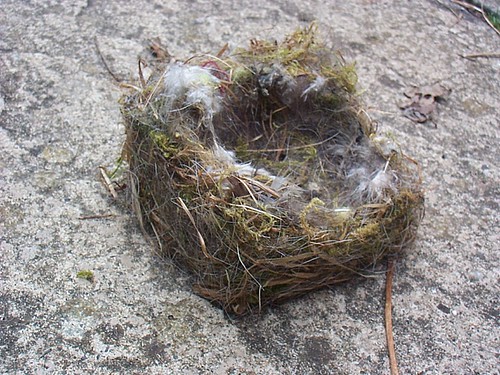
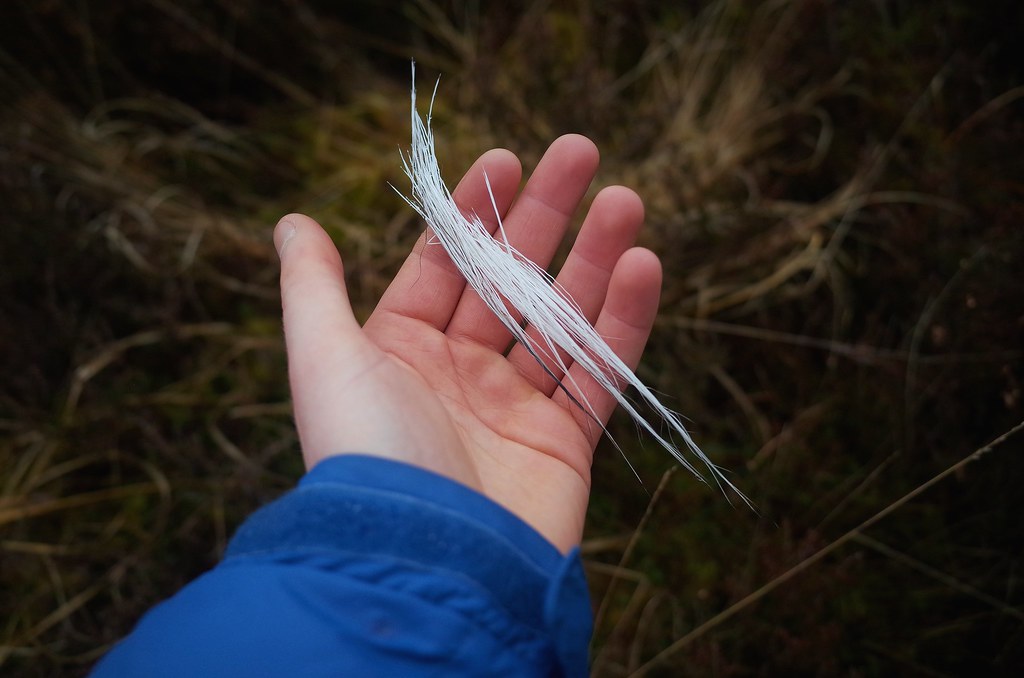
Birds use a wide variety of materials to insulate their nests. Check out your local bird nests to see what materials different species use!
Some examples of nest insulation include:
moss
dried grass
animal fur
plant fibers.
What materials did this bird use as insulation for its nest?
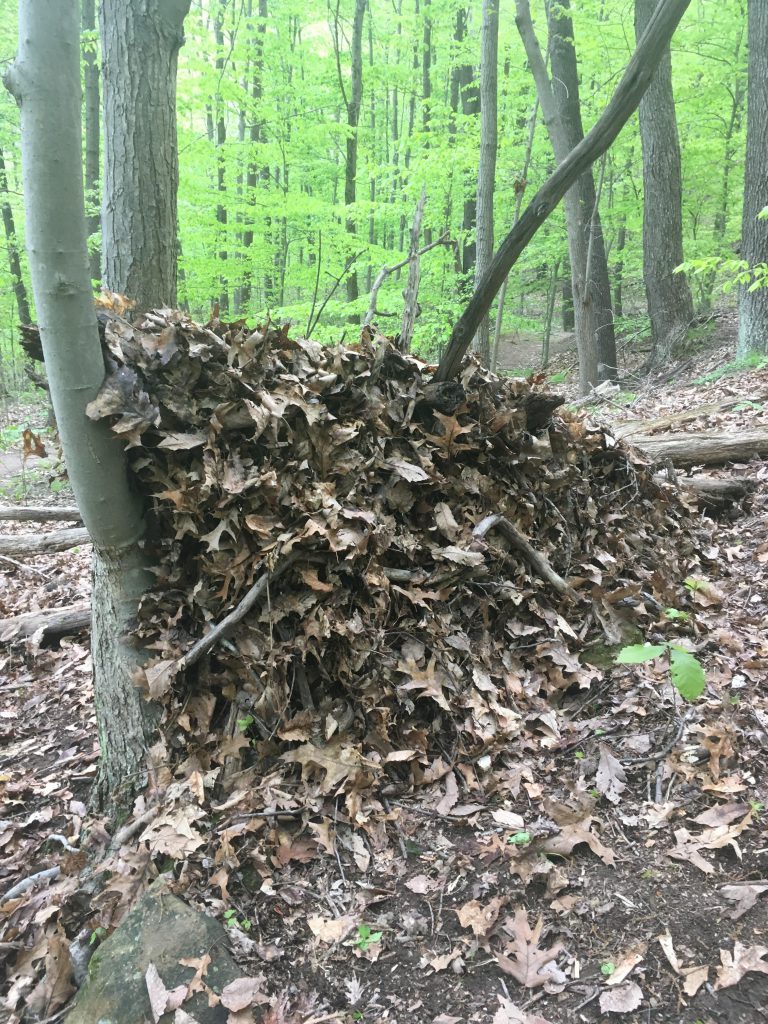
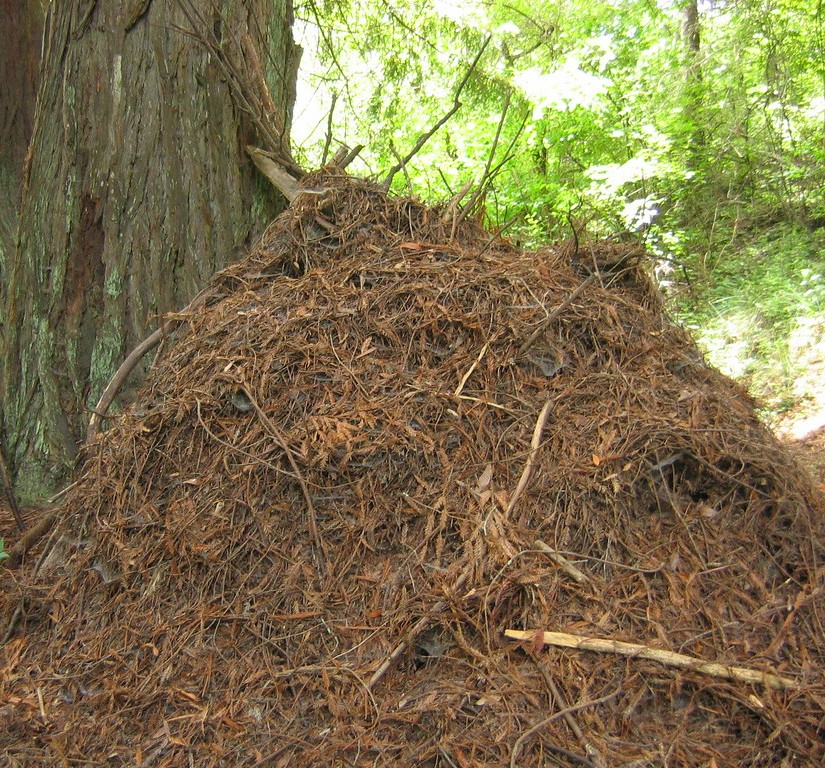
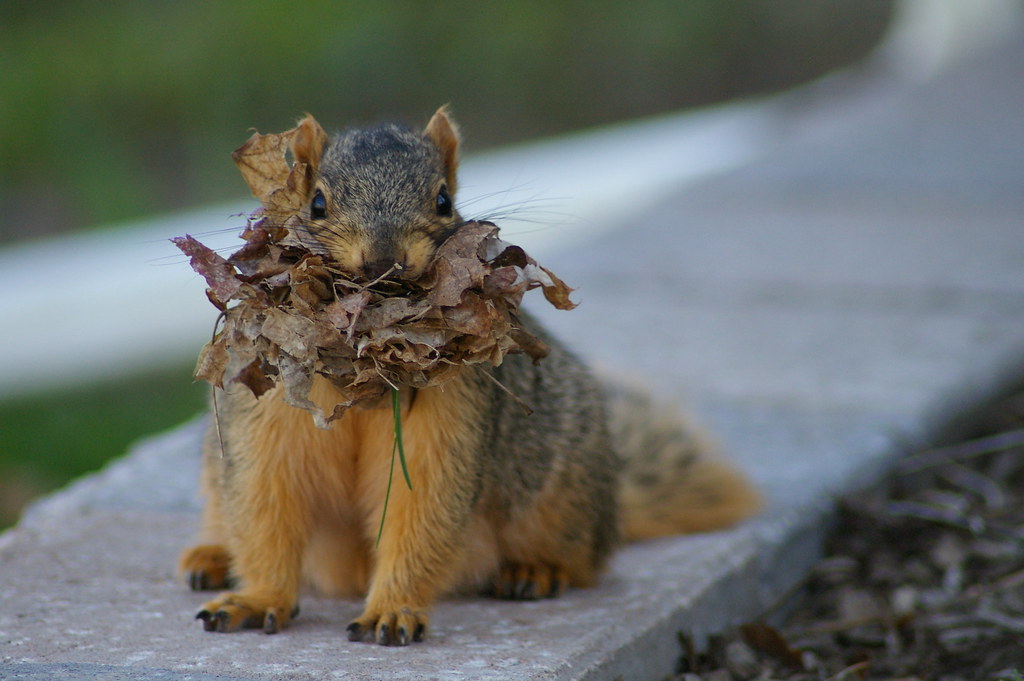
Squirrels use leaves to insulate their nests. Their nests, or dreys, look like big messy leaf piles in tree branches. Our shelter experts, Joe and Nate, recommend humans use 6 inches of leaves on the ground of your shelter and 6 inches on the roof to stay warm!
Squirrels gather leaves into big nests in trees, staying warm all winter.
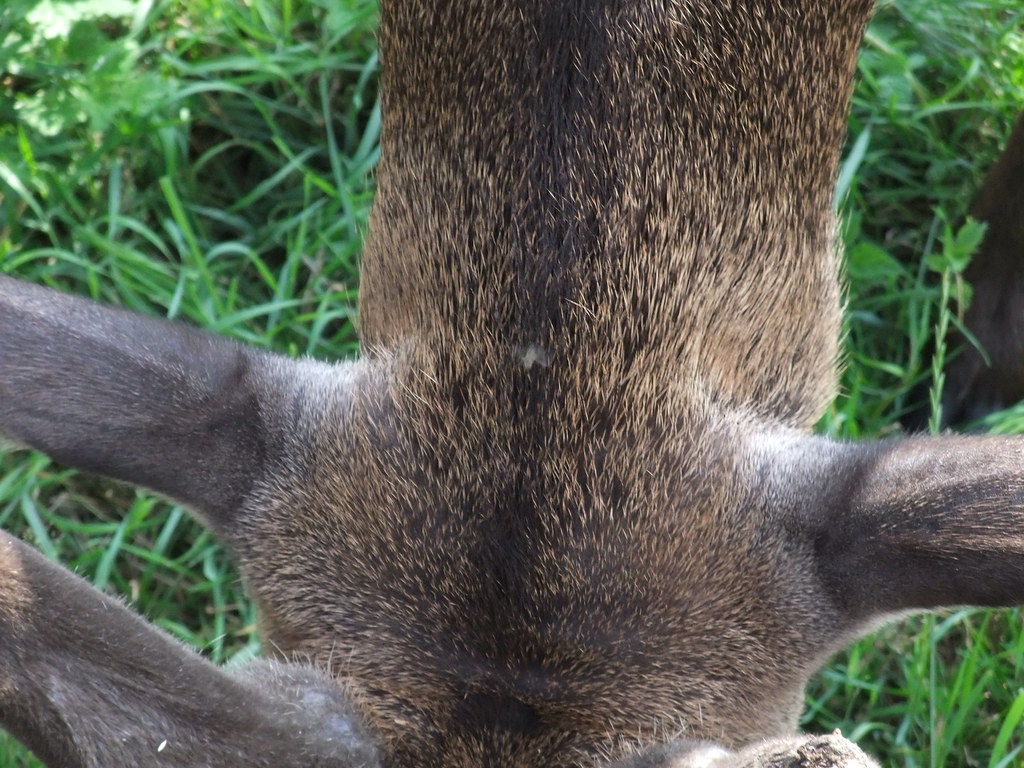
Some mammals have thick fur that insulates them. Deer have hollow fur. Each hollow hair has air space inside. This prevents heat loss–similar to humans wearing multiple clothing layers!
Hollow hair provides trapped air space–giving deer warmth in colder weather!
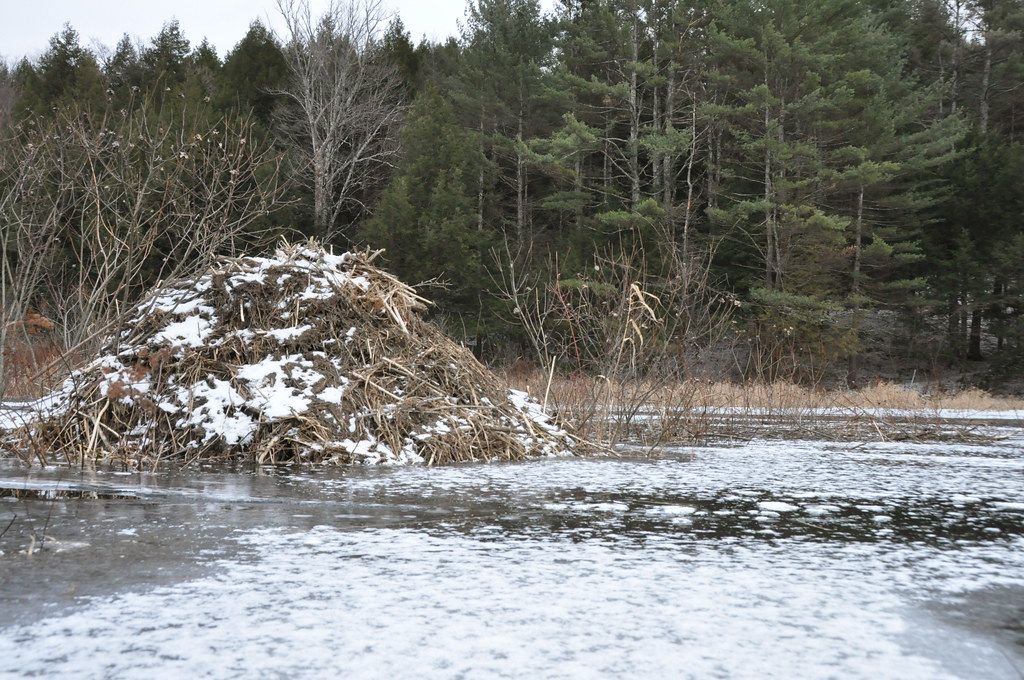
Beavers keep their lodges insulated in winter. They use mud to seal any cracks where cold air might come through. Then, their family’s shared body heat keeps the inside lodge temperature warm.
They have to be careful to not all leave the lodge at once to go foraging for food. Otherwise, the inside temperature would drop while they were away.
Muskrats are known to take advantage of these insulating lodges, even presenting the beavers with cattail treats to let them share the lodge in winter!
Want to create an insulating shelter that imitates a beaver, squirrel or bird?
Jello Baby Experiment Time
Materials:
jello
pot for boiling water
ziplock bag or cup
insulating shelter materials of your choice (you can use some ideas from above!)
Your challenge is to prevent a bag of jello from cooling and solidifying. Use what you learned about insulation above. If you insulate your jello well, your jello baby will stay liquid for a long time!
If you can’t get jello, you could try this with a cup of water on a freezing night.
Step 1.
With a trusted adult, follow the directions on the jello box to boil your jello.
Step 2.
When your jello is no longer boiling hot, but still warm, pour your liquid jello into a ziplock bag and seal. This is your jello baby. Be a good jello parent and keep it safe and warm!
Step 3.
Gather some insulating materials. Use them to build a suitable shelter for your bagged jello. Play around until you find something you like.
Shelter materials could include: leaves, bundled up clothing, hats, moss, or twigs. But you can test whatever materials you want because this is an experiment. It might be interesting to see which materials are the LEAST insulating!
Place your jello baby inside the shelter once you are finished.
Pro-Tip: Get your shelter ready before making the jello, so your jello baby spends less time exposed to outside elements.
Step 4.
Check your jello baby every 10 minutes. Is it still in its liquid phase? Congratulations! You have insulted your shelter well enough to prevent the loss of heat and keep your jello baby warm.
Is your jello solidifying? Oh no! This means your shelter is not insulated enough. Add more materials to test which keep the heat from escaping your shelter.
See how long can you make your jello last. Eventually, all of the jello babies will solidify, since they can’t make their own heat. They are more like a cold-blooded animal than a warm-blooded human.
Step 5.
Let us know in the comments how your experiment turned out! What materials did you use? Was it successful at keeping your shelter insulated? Why or why not? We would love to hear how your jello baby survived.
Stay tuned for more basic survival later in the week!
What shelters do animals build? What can we learn from them for building our own survival shelters? If you’re a kid who loves building forts or dreams of surviving in the woods, this is for you!
I spent the night in this debris hut I built with kids at a summer camp. It was one of my favorite camp-out experiences ever!
Join us via Zoom this Friday! We’ll tour some animal homes, and go over how to build your own shelters.
We are sharing every new activity in the Southeast Ohio Young Naturalists Club facebook group. Join our group for conversation with other nature-exploring families, and to always know what environmental education activities are happening.
Brush up on your survival skills before the virtual field trip
Get started with Nate’s basic survival skills introduction. Tomorrow, Dani will share an fun activity to test some shelter-building materials.
How would you take care of yourself if you were stranded in the wilderness? Have you ever wondered? For the next two weeks, we’ll talk about wilderness survival. Nate starts at the beginning: with preparation.
The best way to stay alive in a survival situation is to never get into one! Survival situations usually happen when something goes wrong. They could be from a mistake that you’ve made, or due to nature’s unpredictable…nature.
Today we’ll focus on being prepared for the worst, just in case something does go wrong. If you’re properly prepared, a situation that may otherwise be life-or-death could have a very simple solution.
Planning Ahead
You’ll save yourself quite a bit of trouble by planning ahead whenever you head out into the wilderness. Even if it’s just a quick hike somewhere that you know really well, make sure you have everything you need to be safe. Some ideas of what to think about:
Always tell someone where you’re going and when you expect to be back.
Bring enough food and water for how long you’ll be gone.
Check the weather. What do you need to stay dry, warm enough, or cold enough?
What route are you hiking? What might you encounter while you are out?
These questions can start you thinking. But every person and situation is different. What dangers or help exist where you are hiking? What are some of your needs? Can you think of any questions we should add? Share your ideas here:
The 10 Essentials
Compass with paper maps and pine flowers placed on dry wheat straw in morning sunlight. Concept of adventure tourism or survival in the forest.
Do you know exactly what you would take with you if you were going on a hike today? Maybe just a water bottle and a jacket, or a giant backpack full of all of the latest camping gear?
I challenge you to pick out “10 essentials ” today, the 10 things that would be most helpful to you in a wilderness emergency. What do you think you really need? Can you fit all 10 essentials into a backpack? Can you carry that backpack comfortably?
Share your lists with us in this form. Or, go to the comments to share a picture of you with your 10 essentials ready to go!
Once you’ve come up with YOUR 10 essentials, check out this list here to see if you agree with some professionals in the field.
The Rule of 3
Perhaps you’re lost and it’s getting dark…what should you do first? Do you look for food or water, build a fire, or find shelter?
The rule of 3 is a guideline to help decide what to do first.
You can survive (approximately):
3 minutes without air
3 hours without shelter (in unsafe conditions like extreme cold or heat)
3 days without water
3 weeks without food
First priority is your brain. Your brain is your most important survival tool. If you panic, stop thinking, or get very discouraged, fancy skills or tools won’t help you. Take care of your brain by taking deep breaths, calming down, and resting when you need to.
After you’ve taken care of your brain, then it’s time to think about shelter, water, and food. That order is important!
Does this rule affect your 10 essentials at all? What did you change, if anything, on your list?
Explore More Survival Skills
Later this week, the Young Naturalists Club will be uploading more videos and blog posts to help you build survival skills. But, if you want to get a head start or need some inspiration for your 10 essentials, check out a few of these videos on youtube!
Joe (another educator on this blog) led this virtual field trip on survival skills, especially fire building. Explore these videos or watch the whole event to learn more about fires and making rope!
Summary
Plan ahead before adventuring in nature. What do you need to think about where you live?
Make a list of 10 essential items that you think could help you the most in a survival situation.
Remember the rule of threes. Does it change your plan?
Research other survival skills that interest you–tell us if you want to learn more about something in particular!
Share your ideas in the forms or in the comments below! We’ll share the ideas that come in later in the week.
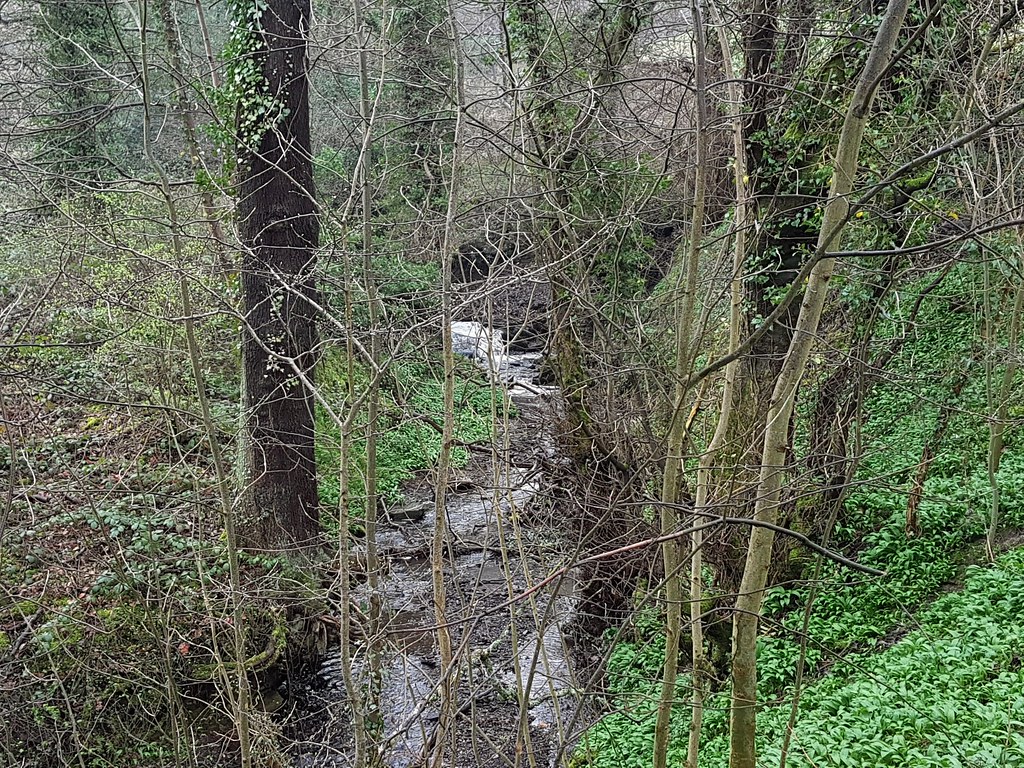
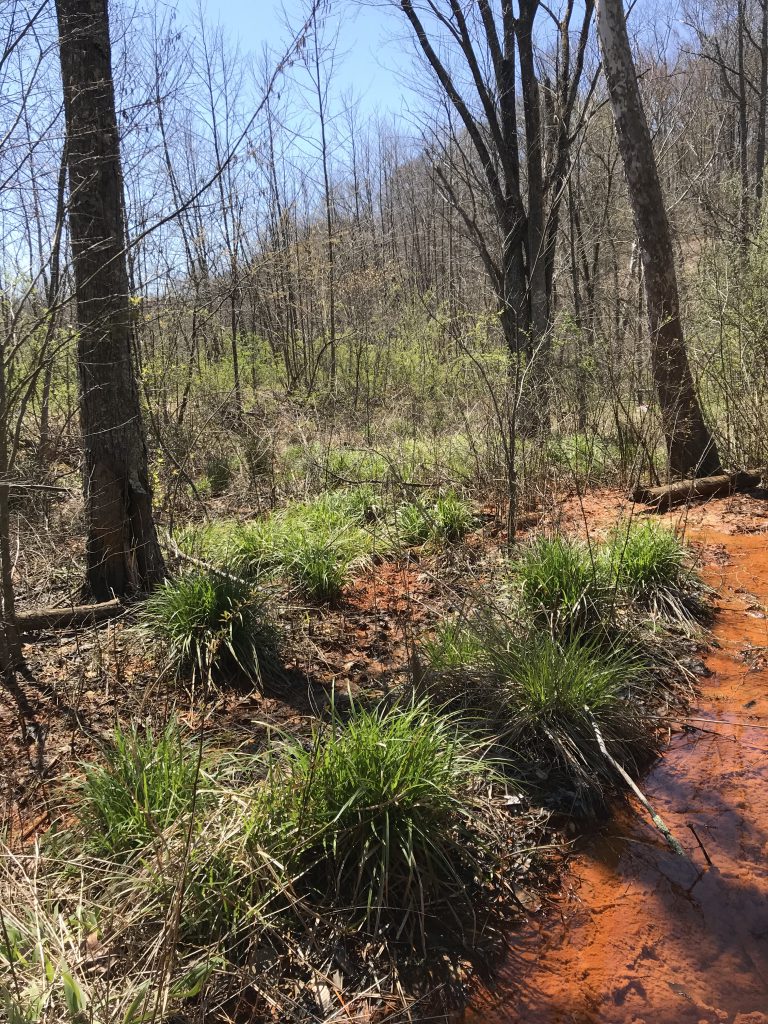
This week, you learned about pH and how coal mining has acidified local streams. A lot of wildlife cannot live in or around streams with acid mine drainage. Luckily, we can do a lot to help streams recover! What ideas do you have for how to make these creeks healthy again?
Lydia shows us a creek that has been affected by Acid Mine Drainage.
If you need a review of what acid mine drainage is, watch these short videos of Pine Run (Perry County, Ohio).
Lydia reviews what AMD is.
The easiest and best way for us to fix AMD is to not let it happen in the first place. We can’t undo the mining that already happened. So how can we stop AMD from happening?
, then no AMD will form. This is called Source Control.
The best way to stop AMD from forming? Keep water from touching and mixing with the pyrite.
Sometimes this means covering big piles of leftover coal waste, also known as gob piles, with impermeable soil. Impermeable means no liquid can pass through. The impermeable soil stops water from reaching any iron pyrite in the first place.
Another way we prevent water from mixing with iron pyrite is preventing stream capture. How and why do you think we could capture a stream?
Sometimes, above old mines, the ground collapses. It falls into the empty space where the coal had been removed. This is a sinkhole. If there is a stream above it, the stream flows down through the sinkhole into the old coal mine (Ahhhh! exactly the opposite of what we want to happen!). Now the stream is “captured” by the mine. Eventually, water fills up the mine and spills out into nearby streams with acid mine drainage.
To prevent this, we fill the collapsing sinkhole with impermeable soil. Then we change the stream’s path to go around it. Now the stream water never mixes with old mines, and never makes AMD!
Treating AMD
Sometimes, we just cannot prevent AMD from forming. I think of it as the stream getting sick. We try our hardest to prevent the stream from getting sick (AMD) but sometimes it happens. So we have to give it ‘medicine’ to treat it.
There are two different ways we do this: passive treatment and active treatment. To remember the differences of these two words, I think of my lazy or “passive” kitty taking a nap and then my other crazy “active” kitty chasing his toys around the house!
When we passively treat AMD, we build something that treats the water, then leave it be! Once it is built, it doesn’t need much maintenance or work. One example is a wetland.
Passive Treatment: Wetlands
One of our wetland treatment sites.
Wetlands are amazing ecosystems. As well as helping treat AMD, they provide habitat for native birds and other wildlife. They also hold water during floods. Wetlands can help treat AMD by making water slowwww downnnn.
When the water slows down, oxygen and tiny bacteria have more time to work their magic. The iron forms here instead of downstream, creating this gunky orange wetland! So how does this help our fish? Well, by controlling where our iron forms (orange gunk), we keep it from washing into rest of the stream, where it will affect all the critters living there.
Here is water slowing down in wetland at one of our treatment sites. It leaves all that gunky iron here, instead of in the rest of the creek.
But iron is only half of the problem. Our pH is still too low. This water is still acidic. To fix this, we must add something with a high pH to raise the pH of the water to a healthy level.
A passive way to do this is to add limestone gravel, just like the kind in your driveway! We reroute our stream, making it flow through layers of limestone. Some of the limestone will dissolve just like sugar in water, raising the pH of the water to a healthy, neutral level.
Neither the wetland nor the limestone gravel need maintenance every year. They can be left alone for long periods of time and still work. This is a cheaper and easier solution in the long run, if you have enough space for a wetland.
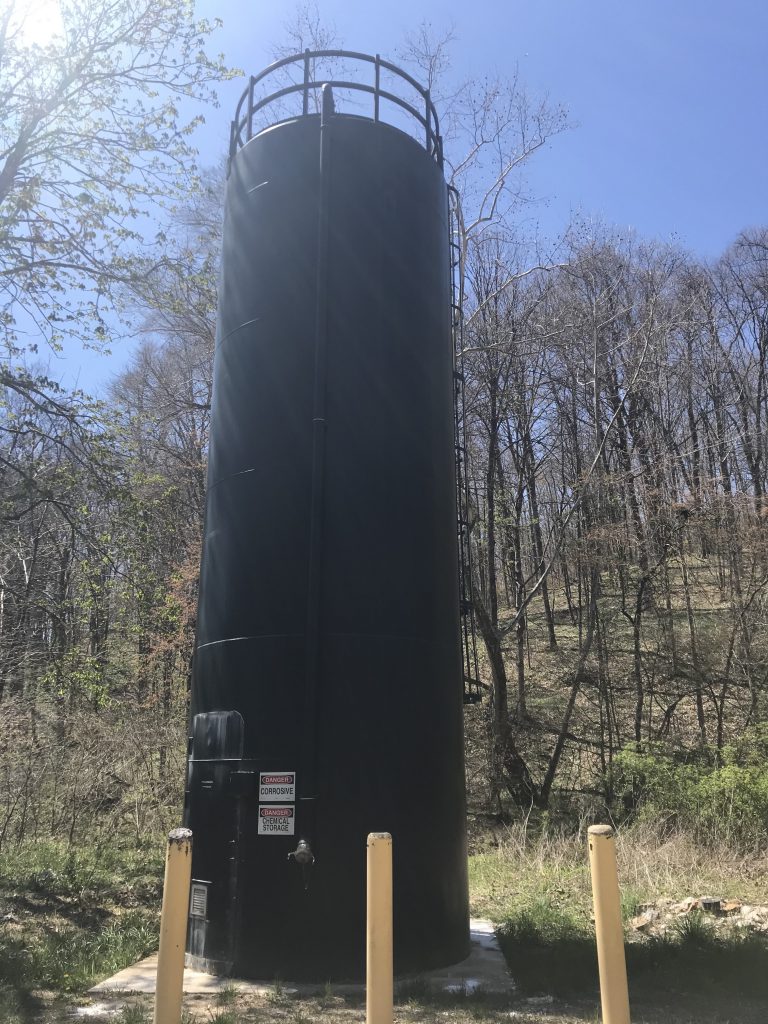
Active treatment: Lime dosers
Finally, our last resort for treating AMD is called a “doser,” which is a form of active treatment. Active treatment means people have to keep taking care of the doser, or it won’t work.
The silo of a lime doser. This active treatment method needs to be refilled with more powdered lime frequently.
Dosers are tall silos, full of activated, powdered lime (it’s made from limestone, not the fruit!!). This lime has a very high pH (it’s basic). The silo pours little doses of basic lime into the acidic water, raising the pH.
The doser uses gravity to work. Water fills up one side of a two-sided bucket. When the water gets heavy, it tips the bucket to the side. This knocks the bar in the middle and a ‘dose’ of limestone is added to the water.
We have to refill the dosers with more powdered lime often. If the doser runs out of lime, the treatment immediately stops working and the stream returns to being too acidic almost immediately. So these dosers require a lot of attention!
Downstream of these dosers, fish have come back to creeks that had been empty for years.
There’s no one right choice
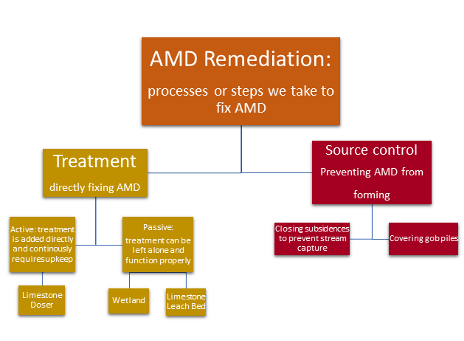
To sum up, there are a ton of different things that water quality specialists and environmentalists must think about before we can treat AMD. No two Acid Mine Discharge sites are the same. In many places, we use a variety of the techniques from above to fix the streams as best we can. Here is a handy little chart to help you compare:
A summary of the different ways we can treat acid mine drainage.
Activity: “Dose” your own AMD
In Monday’s lesson, we learned how to test the pH of a liquid.
Today, we’ll explore how to change the pH of a liquid. That’s what we do when we treat acid mine drainage. Watch what happens when an ultra-basic material (our lime powder, which has a pH of 14+) meets an acidic material (acid mine drainage):
Lydia shows us the reaction between the lime we use to treat our streams and the AMD in the stream.
Woah! The basic lime and acidic mine drainage react. This reaction releases energy as heat. Did you see steam from the reaction and the cup melting? It is very hot!
This happens when we add a little bit of AMD to a LOT of powdered lime. This causes the reaction to happen very fast, so we can see it. The doser adds only a little lime to a lot of water and AMD. So the reaction happens much more slowly in the stream, and is not so dangerous.
We can create a similar reaction at home mixing two common items: vinegar (acidic, or low pH) and baking soda (basic, or high pH).
Materials needed:
Vinegar
Baking soda
Measuring spoons
Large bowl
Notebook/pencil
Your thinking cap!
To create the reaction:
Measure out ½ cup of vinegar into a large bowl.
Add a tablespoon of baking soda to the vinegar. Observe what happens. What is similar or different from my video above?
Imagine your vinegar is a stream we are trying to fix. Could you make the vinegar neutral? How?
Continue to experiment slowly with adding more or less baking soda. If the reaction stops, the pH is probably close to neutral.
Congrats–you just changed the pH!
To be sure whether it worked, you can check the pH of your treated vinegar with the cabbage indicator or pH strips.
Summary
We treat acid mine drainage either by stopping it from forming, or by fixing the pH.
To fix the pH, we can use passive treatments (wetlands) or active treatments (lime dosers).
Try changing pH yourself at home with the baking soda and vinegar experiment. You are doing the same basic thing we do to make our creek liveable for fish!
We are sharing every new activity in the Southeast Ohio Young Naturalists Club facebook group. Join our group for conversation with other nature-exploring families, and to always know what environmental education activities are happening.